When Bread Stops Being Comforting
You probably remember the warm, yeasty scent of freshly baked bread wafting through your childhood kitchen. Maybe you even dream about biting into a soft slice smeared with butter. But for you or someone close to you that dream turned into a digestive nightmare the moment gluten entered the equation.
Celiac disease, gluten sensitivity, or a personal choice to avoid gluten may have taken traditional bread off your table. The problem? Most store bought gluten-free loaves are dry, crumbly, flavorless or worse, loaded with preservatives and mystery ingredients.
If you’ve been missing the joy of real bread, you’re in the right place. Let’s fix that. This guide will walk you step by step through baking your own easy gluten free bread . no stress, no fancy equipment, just wholesome goodness and reliable results.
10 Irresistible Homemade Sandwich Bread Recipes for Fresh, Fluffy Perfection

H2: What Is Gluten-Free Bread (and Why Should You Care)?
H3: Understanding the Gluten Dilemma
Gluten is a protein found in wheat, rye, and barley. For many, it’s harmless. But for you, it might be the root cause of bloating, fatigue, skin issues, or worse. If you’ve ever dealt with celiac disease or non-celiac gluten sensitivity, even a crumb of gluten could trigger discomfort.
H3: What Makes Gluten-Free Bread Different?
Since gluten gives traditional bread its chewy texture and structure, removing it requires some baking wizardry. In gluten free bread, you’ll be using:
- Alternative flours like almond, sorghum, or brown rice
- Official operators such as xanthan gum or psyllium husk
- Moisture-retaining ingredients to keep the loaf from drying out
This may sound like a science experiment, but once you get the hang of it, you’ll wonder why you didn’t start sooner.
H2: Why Make Your Own Gluten-Free Bread?
H3: You Control What Goes In
When you bake it yourself, there’s no need to guess what “natural flavors” or “stabilizers” really mean. You choose:
- Organic ingredients
- Whole grains
- Natural sweeteners
- No fillers, no junk
H3: Freshness You Can Taste
Homemade gluten free bread doesn’t sit in a factory warehouse or get trucked across the country. It’s fresh, warm, and comforting in a way packaged bread never is.
H3: Cost-Effective and Customizable
If you’re buying gluten-free bread regularly, you already know the price adds up—$7 or more for a loaf that feels like cardboard. Making it at home can cut that cost in half and gives you the freedom to create the flavors you actually want.
H2: Must-Have Ingredients for Gluten-Free Bread
Before you start mixing, you’ll want to understand what each ingredient does in your recipe.
H3: Gluten-Free Flours to Try
A great loaf usually combines 2–3 types of flours for better texture and taste:
- Brown rice flour : mild, neutral, and easy to digest
- Almond flour : moist, rich in protein, and slightly nutty
- Sorghum flour : adds structure and nutrition
- Buckwheat flour : earthy flavor, high in fiber
- Custard starch or potato starch : makes a difference with chewiness and delicateness
H3: The Role of Binders and Additives
Without gluten, your bread needs help sticking together. Use:
- Xanthan gum : most common binder, gives elasticity
- Psyllium husk : great for gut health and structure
- Chia or flaxseed gel : adds fiber and helps trap moisture
H4: Ingredient Substitution Table
| Ingredient | Substitute | Purpose |
|---|---|---|
| Xanthan gum | Psyllium husk, chia gel | Binding + elasticity |
| Eggs | Flax eggs, chia eggs | Structure + moisture |
| Milk | Almond, soy, oat milk | Liquid + softness |
H2: The Foolproof Easy Gluten-Free Bread Recipe
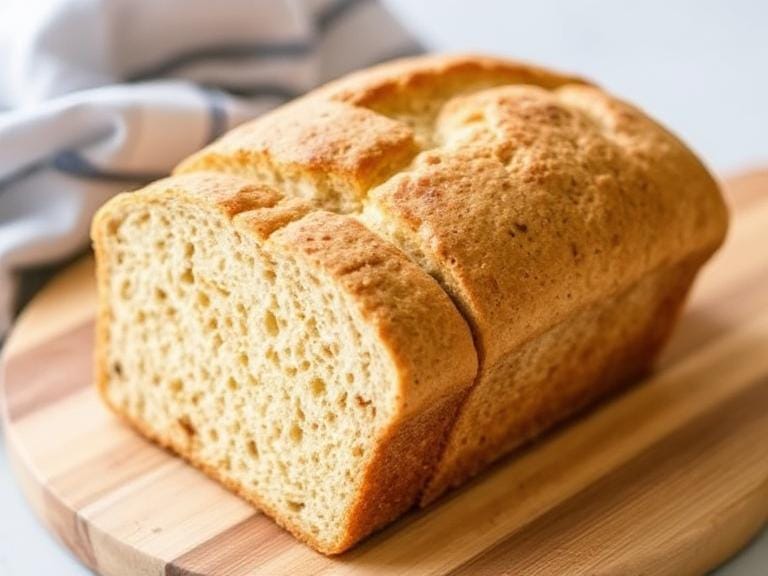
Ready to get baking? This recipe is beginner-friendly, doesn’t require kneading, and bakes into a soft, golden loaf you’ll be proud of.
H3: Ingredients (Measured for 1 Loaf)
| Ingredient | Quantity |
|---|---|
| Gluten-free flour mix | 2 ½ cups |
| Warm water | 1 ¼ cups |
| Active dry yeast | 2 ¼ tsp |
| Olive oil | 2 tbsp |
| Honey (optional) | 1 tbsp |
| Salt | 1 tsp |
| Xanthan gum | 1 tsp |
Tip: Make sure all your ingredients are labeled gluten-free, especially the yeast and flour blend.
H3: Instructions
- In a bowl, break up yeast and nectar in warm water. Let it sit for 5–10 minutes until frothy.
- In a separate large bowl, combine flour mix, salt, and xanthan gum.
- Pour the yeast mixture and oil into the dry ingredients.
- Stir well until a thick batter forms no kneading needed.
- Exchange to a lubed lounge dish and cover with a towel.
- Let rise in a warm spot for 30–45 minutes until doubled in size.
- Bake at 375°F (190°C) for 45–50 minutes.
- Let cool completely before slicing.
Tip: The bread is done when the internal temperature hits about 200°F.

H2: Troubleshooting Your Gluten-Free Bread
Even pros get the occasional baking fail. Here’s how you can avoid common issues:
H3: Bread Is Too Dense
- Add a little more water to loosen the batter
- Utilize a lighter flour like rice or sorghum within the mix
H3: Doesn’t Rise Enough
- Make sure your yeast is alive (test with sugar and warm water)
- Avoid letting it proof in a drafty or cold area
H3: Crumbly or Dry Texture
- Don’t skip the binder (xanthan gum or psyllium)
- Let the bread cool completely some time recently slicing it ought to wrap up setting
H2: Creative Variations to Try
Once you master the fundamental formula, it’s time to get creative.
H3: Sweet Variations
- Add mashed banana and cinnamon for banana bread
- Mix in grated apples and raisins for a cozy apple loaf
H3: Savory Twists
- Stir in chopped herbs, garlic, and sun-dried tomatoes
- Sprinkle cheese and olives for a Mediterranean feel
H3: Vegan Gluten-Free Option
- Replace eggs with flax or chia eggs (1 tbsp ground seed + 3 tbsp water)
- Use plant-based milk and skip honey for maple syrup
H2: Storing Your Homemade Gluten-Free Bread
You want all your effort to last more than a day, right?
H3: Room Temperature (Short-Term)
- Store in an airtight container or bread bag
- Best enjoyed within 2–3 days
H3: Freezing (Long-Term)
- Slice before freezing
- Separate slices with parchment paper
- Toast straight from frozen for best texture
H2: Helpful Tools for Better Baking Results
You don’t need fancy gear, but a few items can really up your bread game:
- Digital scale – Accuracy matters in gluten-free baking
- Stand mixer – Saves time and ensures consistent mixing
- Silicone loaf pan – Prevents sticking and makes cleanup easier
- Thermometer – Confirms the bread is baked through

H2: FAQs About Easy Gluten Free Bread
H3: Can I make gluten free bread without xanthan gum?
Yes, you can substitute it with psyllium husk, chia seeds, or flax gel. Each will help maintain structure and moisture.
H3: What is the best flour for gluten free bread?
No single flour does the job. A combination—like brown rice, sorghum, and a starch (like tapioca)—usually gives the best texture and flavor.
H3: How long does homemade gluten free bread last?
It stays fresh for 2–3 days on the counter and up to 3 months in the freezer when properly wrapped.
H3: Can I use a bread machine?
Definitely. Many machines come with a gluten-free setting. Just follow your recipe and monitor the first mix cycle to make sure the batter forms evenly.
H2: Reclaim the Joy of Bread , One Slice at a Time
You don’t have to settle for crumbly, overpriced bread anymore. With a handful of ingredients and less than two hours of your time, you can create a gluten-free loaf that feels like a warm hug from your kitchen.
No more guessing at labels. No more flavorless slices. Just real bread, made your way.
✅ Call to Action
If you’re ready to bring back comfort to your table, try this recipe today and share your results with others. Snap a photo of your loaf and tag it with #EasyGlutenFreeBread on social media. Have your own twist on the recipe? Drop it in the comments or subscribe to get more gluten free guides, recipes, and tips sent straight to your inbox.
Because bread should bring people together not stress you out.


